How To Install Open Journal System (OJS) with LEMP on Debian 12
Intro
Open Journal System (OJS) is the most widely used scholarly publishing software in the world. It counts more than 30,000 journals in 150 countries that use OJS to publish research in 60+ languages.
Below is the tutorial to manually install OJS with Linux, Nginx, MySQL, and PHP.
Installing Prerequisite
OJS is a web application based on PHP. it also supports databases, such as MySQL, MariaDB, or PostgreSQL. Additionally, it requires some PHP extension.
Let's install the required dependencies of PHP 8.0+ with php-mbstring, php-xml, and php-intl enabled.
sudo apt install php-fpm php-mysql php-xml php-intl php-mbstring nginx
We are going to install it with MySQL, but since the Debian repository did not naturally come up with it, we have to manually install it.
cd /tmp
wget https://dev.mysql.com/get/mysql-apt-config_0.8.26-1_all.deb
sudo dpkg -i mysql-apt-config*

#libssl
wget http://security.debian.org/debian-security/pool/updates/main/o/openssl/libssl1.1_1.1.1n-0+deb11u5_amd64.deb
sudo dpkg -i libssl*

sudo apt update
sudo apt install mysql-server
Next, let's create a database.
Creating a MySQL Database and User for OJS
Make sure you already set up a basic MySQL installation or using sudo mysql_secure_installation.
The below snippet is to log in to MySQL, you will be asked for the password. After that, it will create a ojs-db database. We'll create a new user account and set the database to only able to be managed by the account.
mysql -u root -p
CREATE DATABASE ojs_db DEFAULT CHARACTER SET utf8 COLLATE utf8_unicode_520_ci;
CREATE USER 'ojs_user'@'localhost' IDENTIFIED BY 'ojs_password';
GRANT ALL ON ojs_db.* TO 'ojs_user'@'localhost';
You now have a database and user account that is made to specifically handle that particular database.
Configuring Nginx
This is pretty much a standard PHP and Nginx configuration. A few points to note is you should adjust the server_name to your intended IP/domain and the root folder of the installation path, in this case, I use /var/www/ojs.
Finally, adjust the php-fpm version with the one you installed.
sudo nano /etc/nginx/sites-available/your_domainserver {
listen 80;
listen [::]:80;
root /var/www/ojs;
index index.php;
server_name server_domain_or_IP;
location = /favicon.ico { log_not_found off; access_log off; }
location = /robots.txt { log_not_found off; access_log off; allow all; }
location ~* \.(css|gif|ico|jpeg|jpg|js|png)$ {
expires max;
log_not_found off;
}
location / {
try_files $uri $uri/ /index.php?$args;
}
location ~ ^(.+\.php)(.*)$ {
set $path_info $fastcgi_path_info;
fastcgi_split_path_info ^(.+\.php)(.*)$;
fastcgi_param PATH_INFO $path_info;
fastcgi_param PATH_TRANSLATED $document_root$path_info;
if (!-f $document_root$fastcgi_script_name) {
return 404;
}
include snippets/fastcgi-php.conf;
fastcgi_pass unix:/var/run/php/php8.2-fpm.sock;
}
}Links the file the configuration file to to sites-enabled directory:
sudo ln -s /etc/nginx/sites-available/your_domain /etc/nginx/sites-enabled/Verify our configuration in case there are syntax errors with:
sudo nginx -t If it's all good, let's reload Nginx.
sudo systemctl reload nginxNext, let's start with the main parts.
Installing Open Journal System
It's a good idea to check if there is a newer version or any version you intend to install from https://pkp.sfu.ca/software/ojs/download/.
We going to download the app release, extract it, and copy it to the OJS installation path.
cd /tmp
curl -LO https://pkp.sfu.ca/ojs/download/ojs-3.4.0-3.tar.gz
tar xzvf ojs-3.4.0-3.tar.gz
sudo cp -a /tmp/ojs-3.4.0-3/. /var/www/ojs
Make sure we change the owner and group of the folder so it can be accessed by Nginx.
sudo chown -R www-data:www-data /var/www/ojsOJS requires a file directory outside of the web root (the installation path/folder). It ensures private files, like unpublished submissions, can not be accessed by unauthorized users.
sudo mkdir /var/www/ojs-files
sudo chown -R www-data:www-data /var/www/ojs-files
Finishing up installation
After the whole server configuration is done, we can start to finish the installation via the OJS web interface.
Let's visit the following link on a browser.
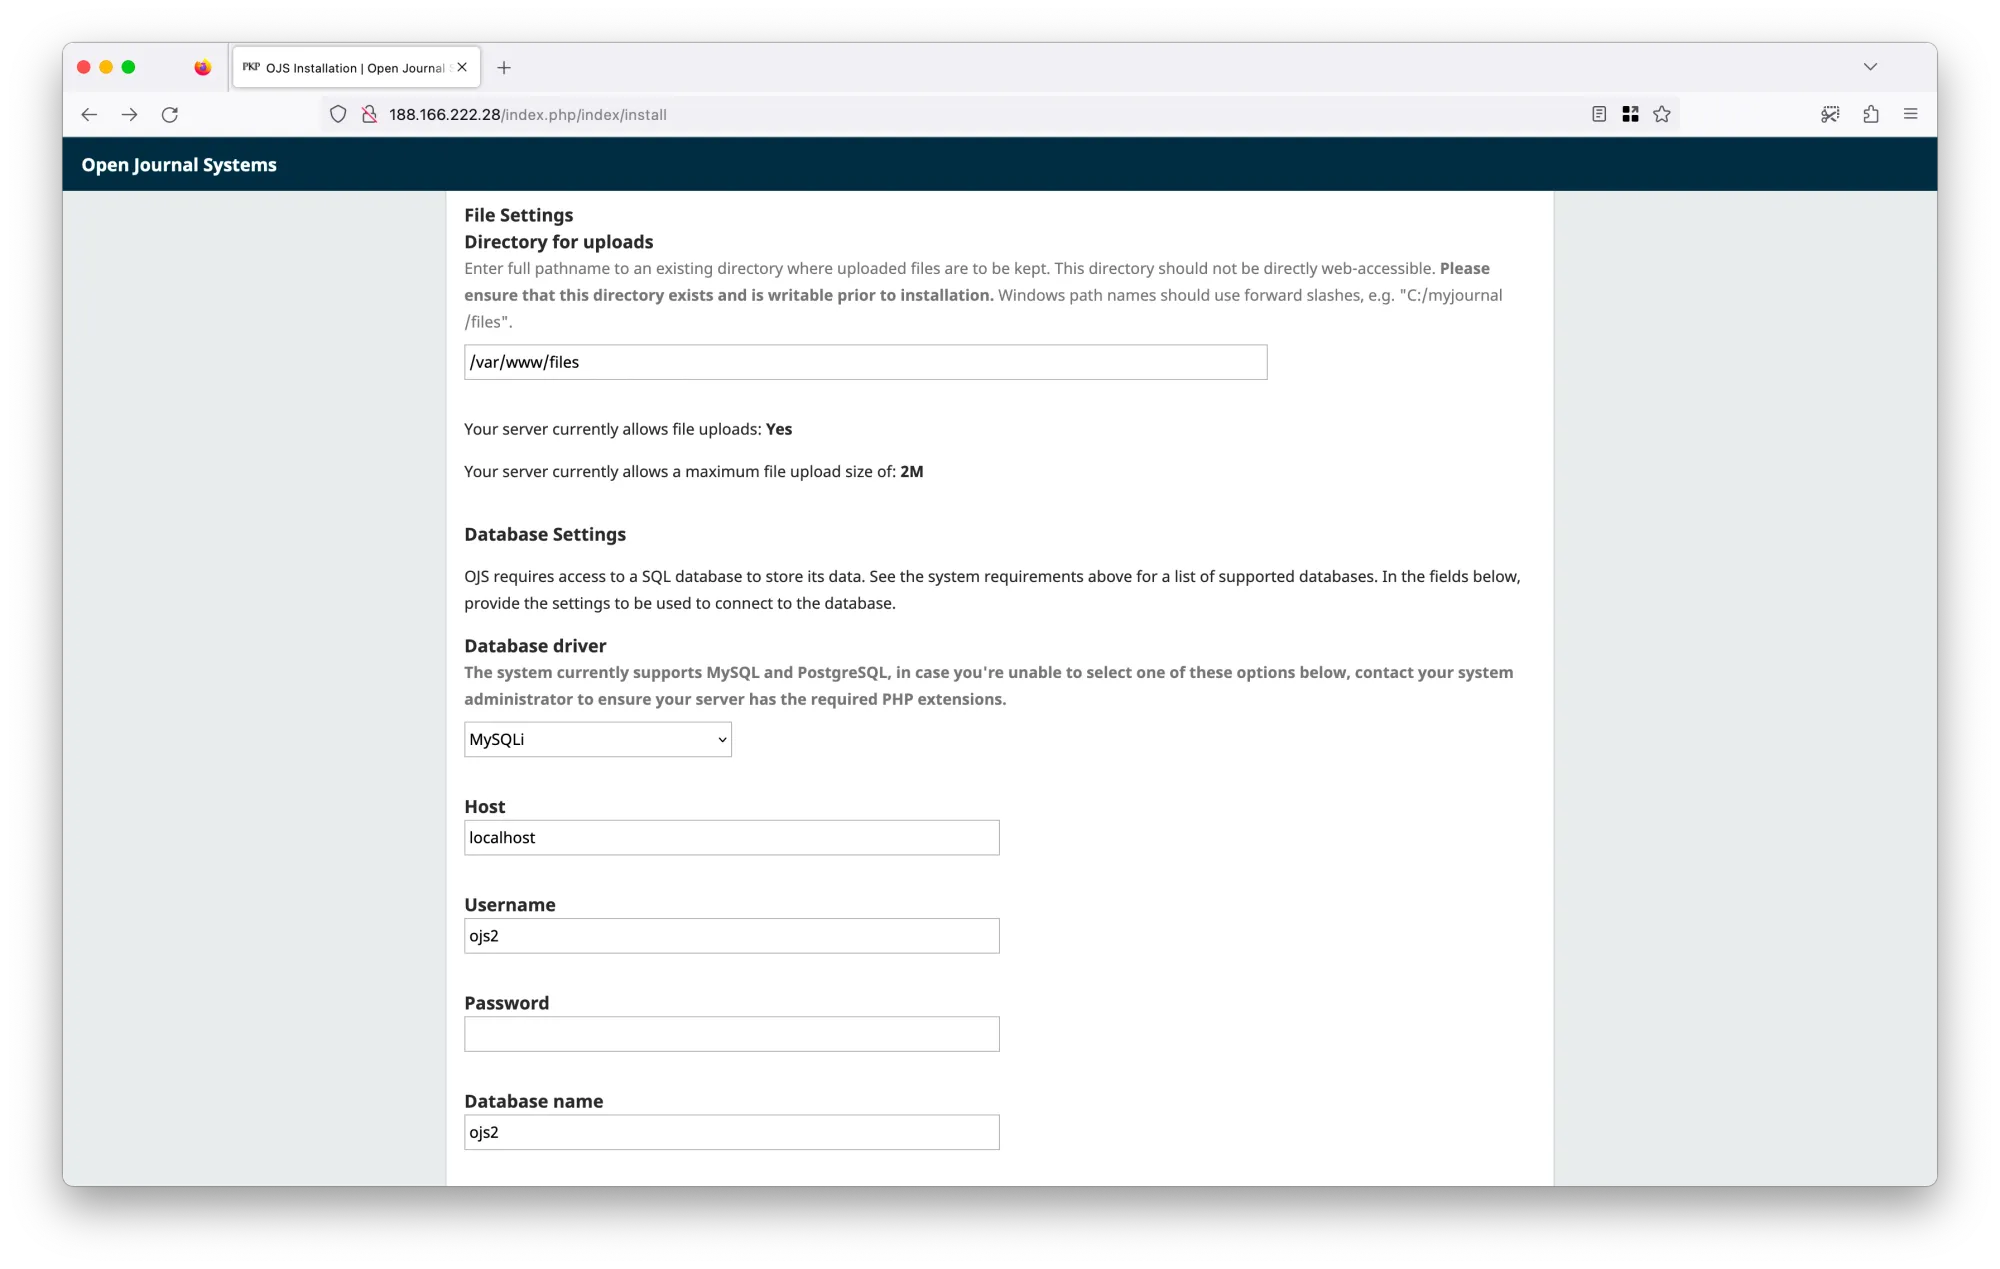
http://server_domain_or_IP/Takes note, of our database name, user, password, and also our file directory. We will input those into the installation interface.
You will be greeted with the following images.
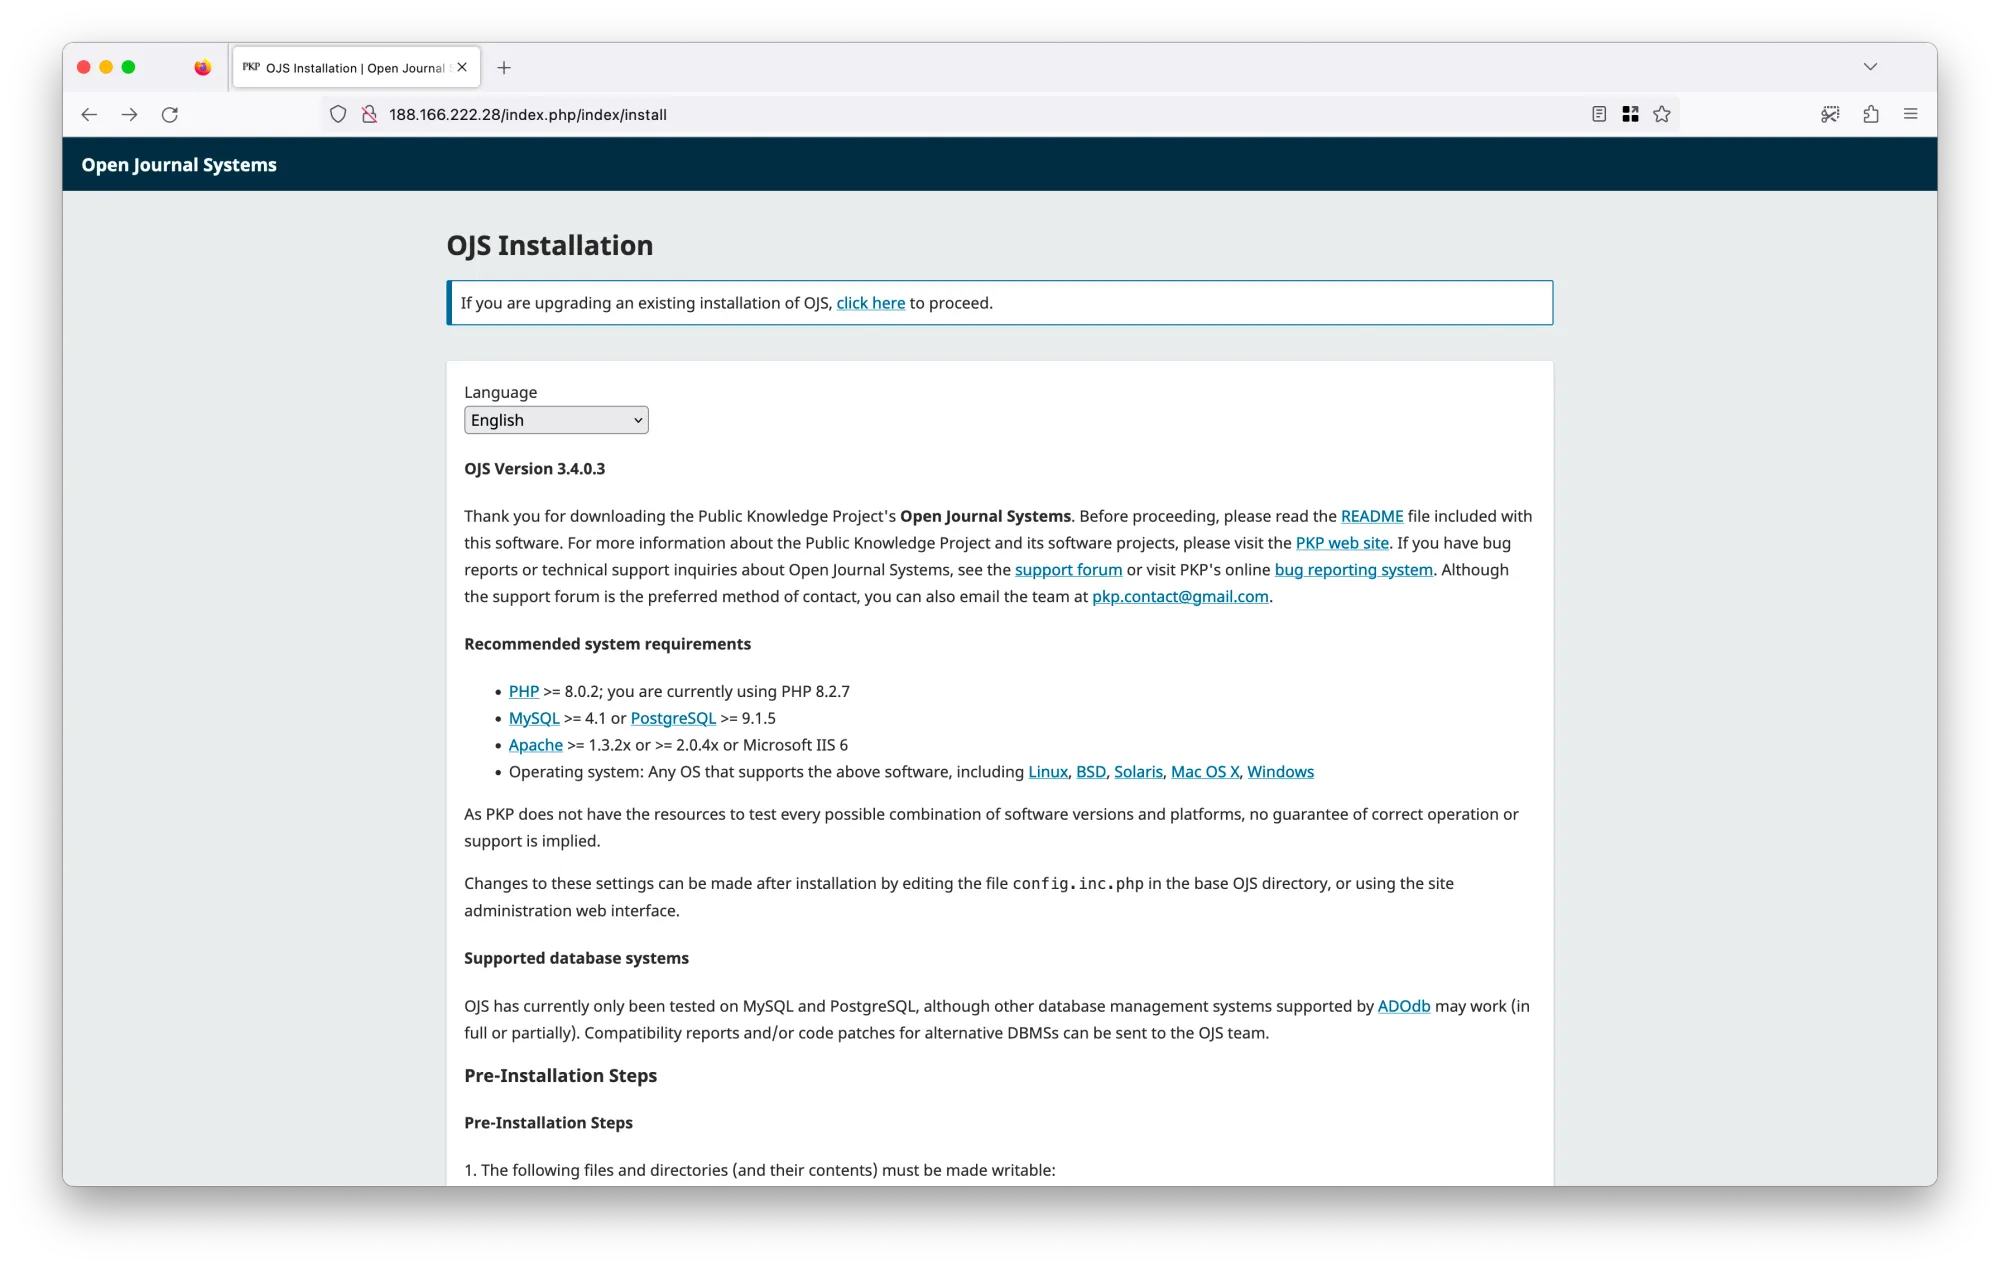
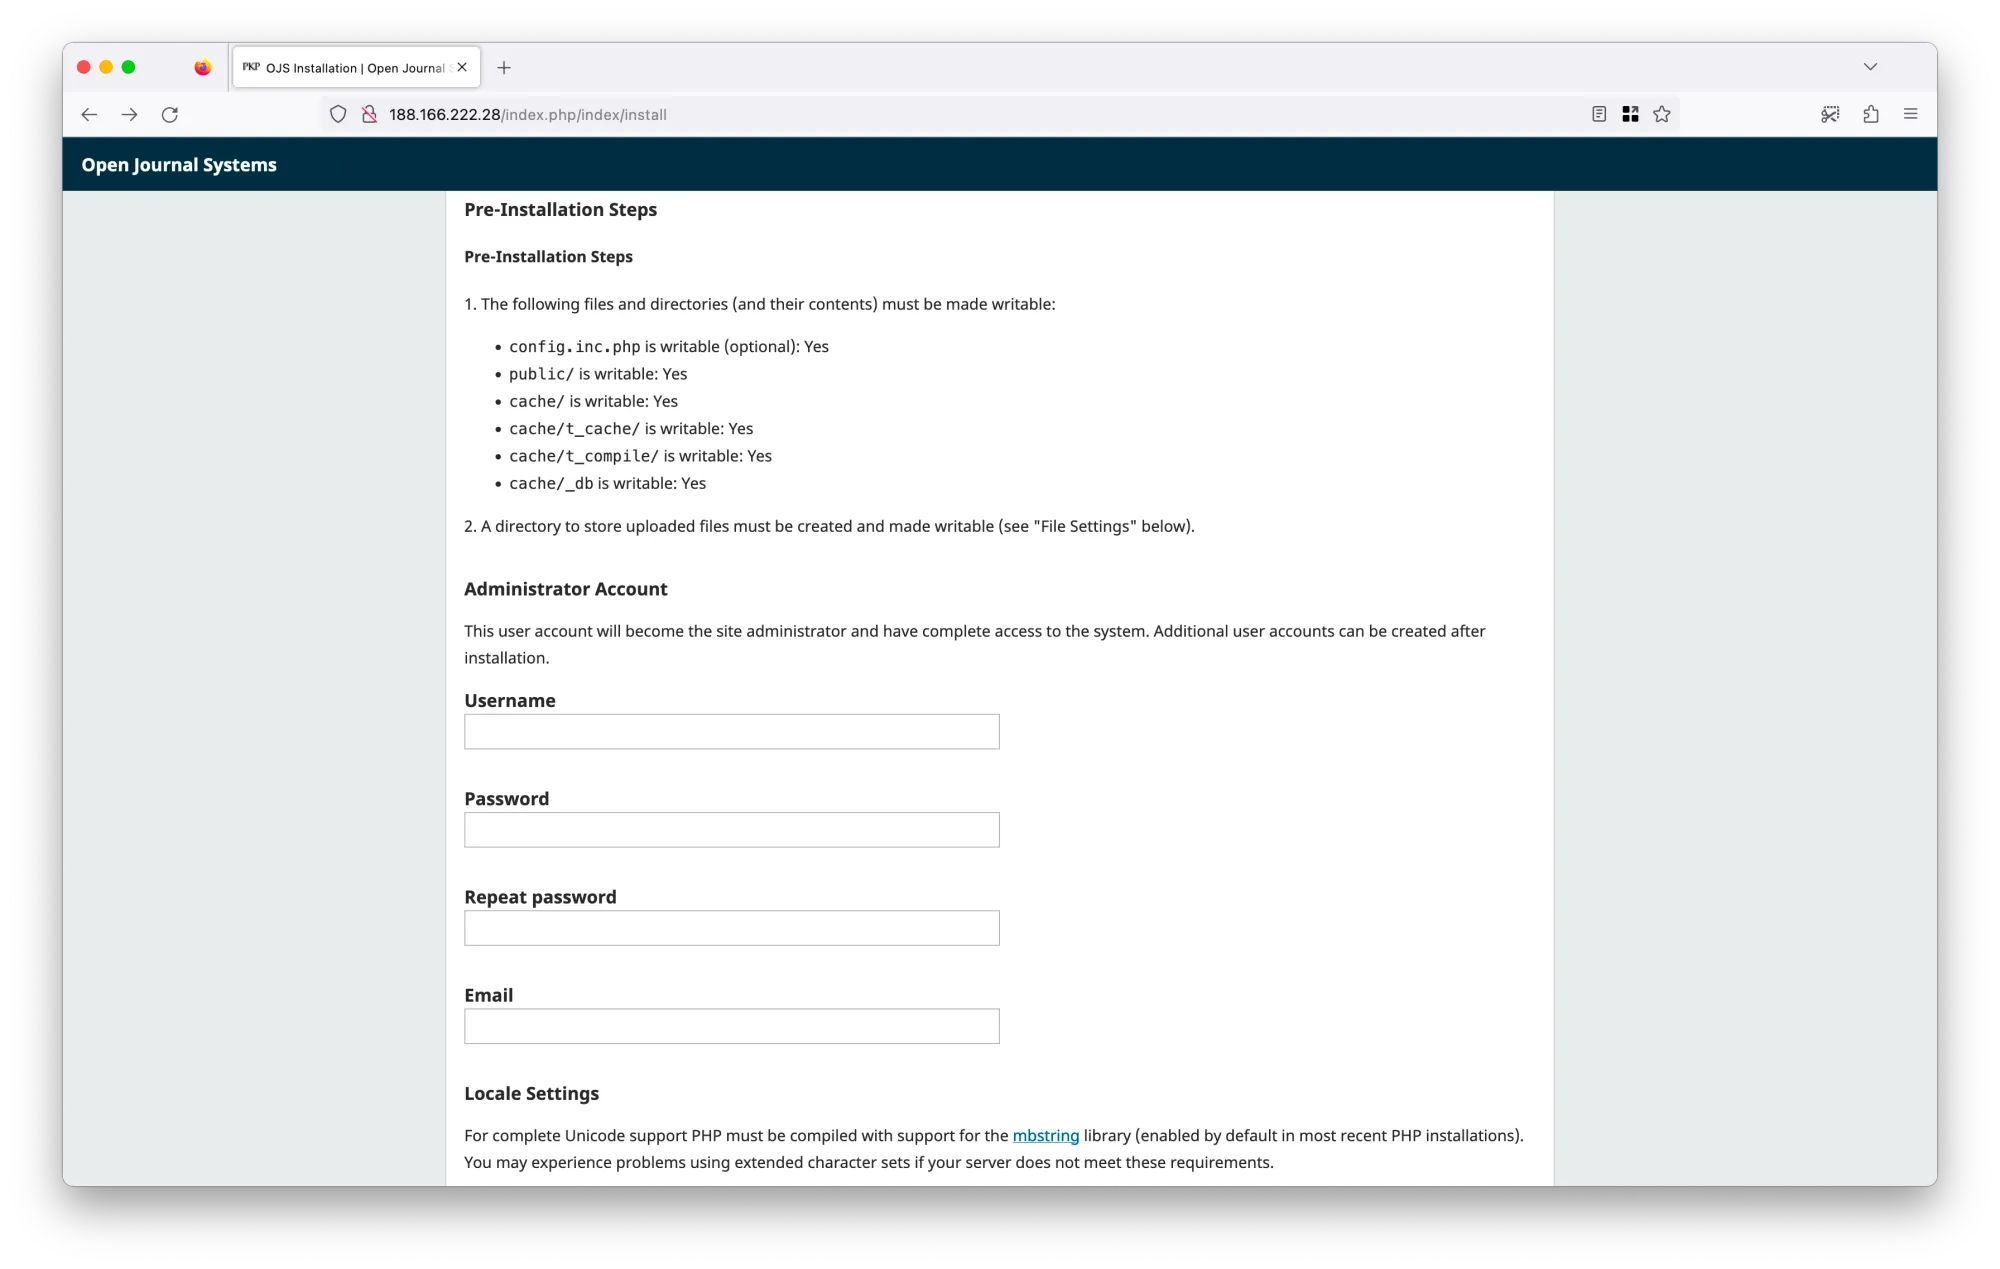
Ensure the files and directories as listed in the pre-installation steps are writeable.
If it's all good, continue to create the admin account.
Adjust the directory file with the one we have created. Furthermore, at step 2, we have created the database with its own account. Input those credentials into the appropriate forms.
Scroll all the way down and click Install Open Journal Systems the button to finish the installation. If there is nothing wrong, you will end up with the image below. If there is indeed something wrong, continue to troubleshoot the given error.
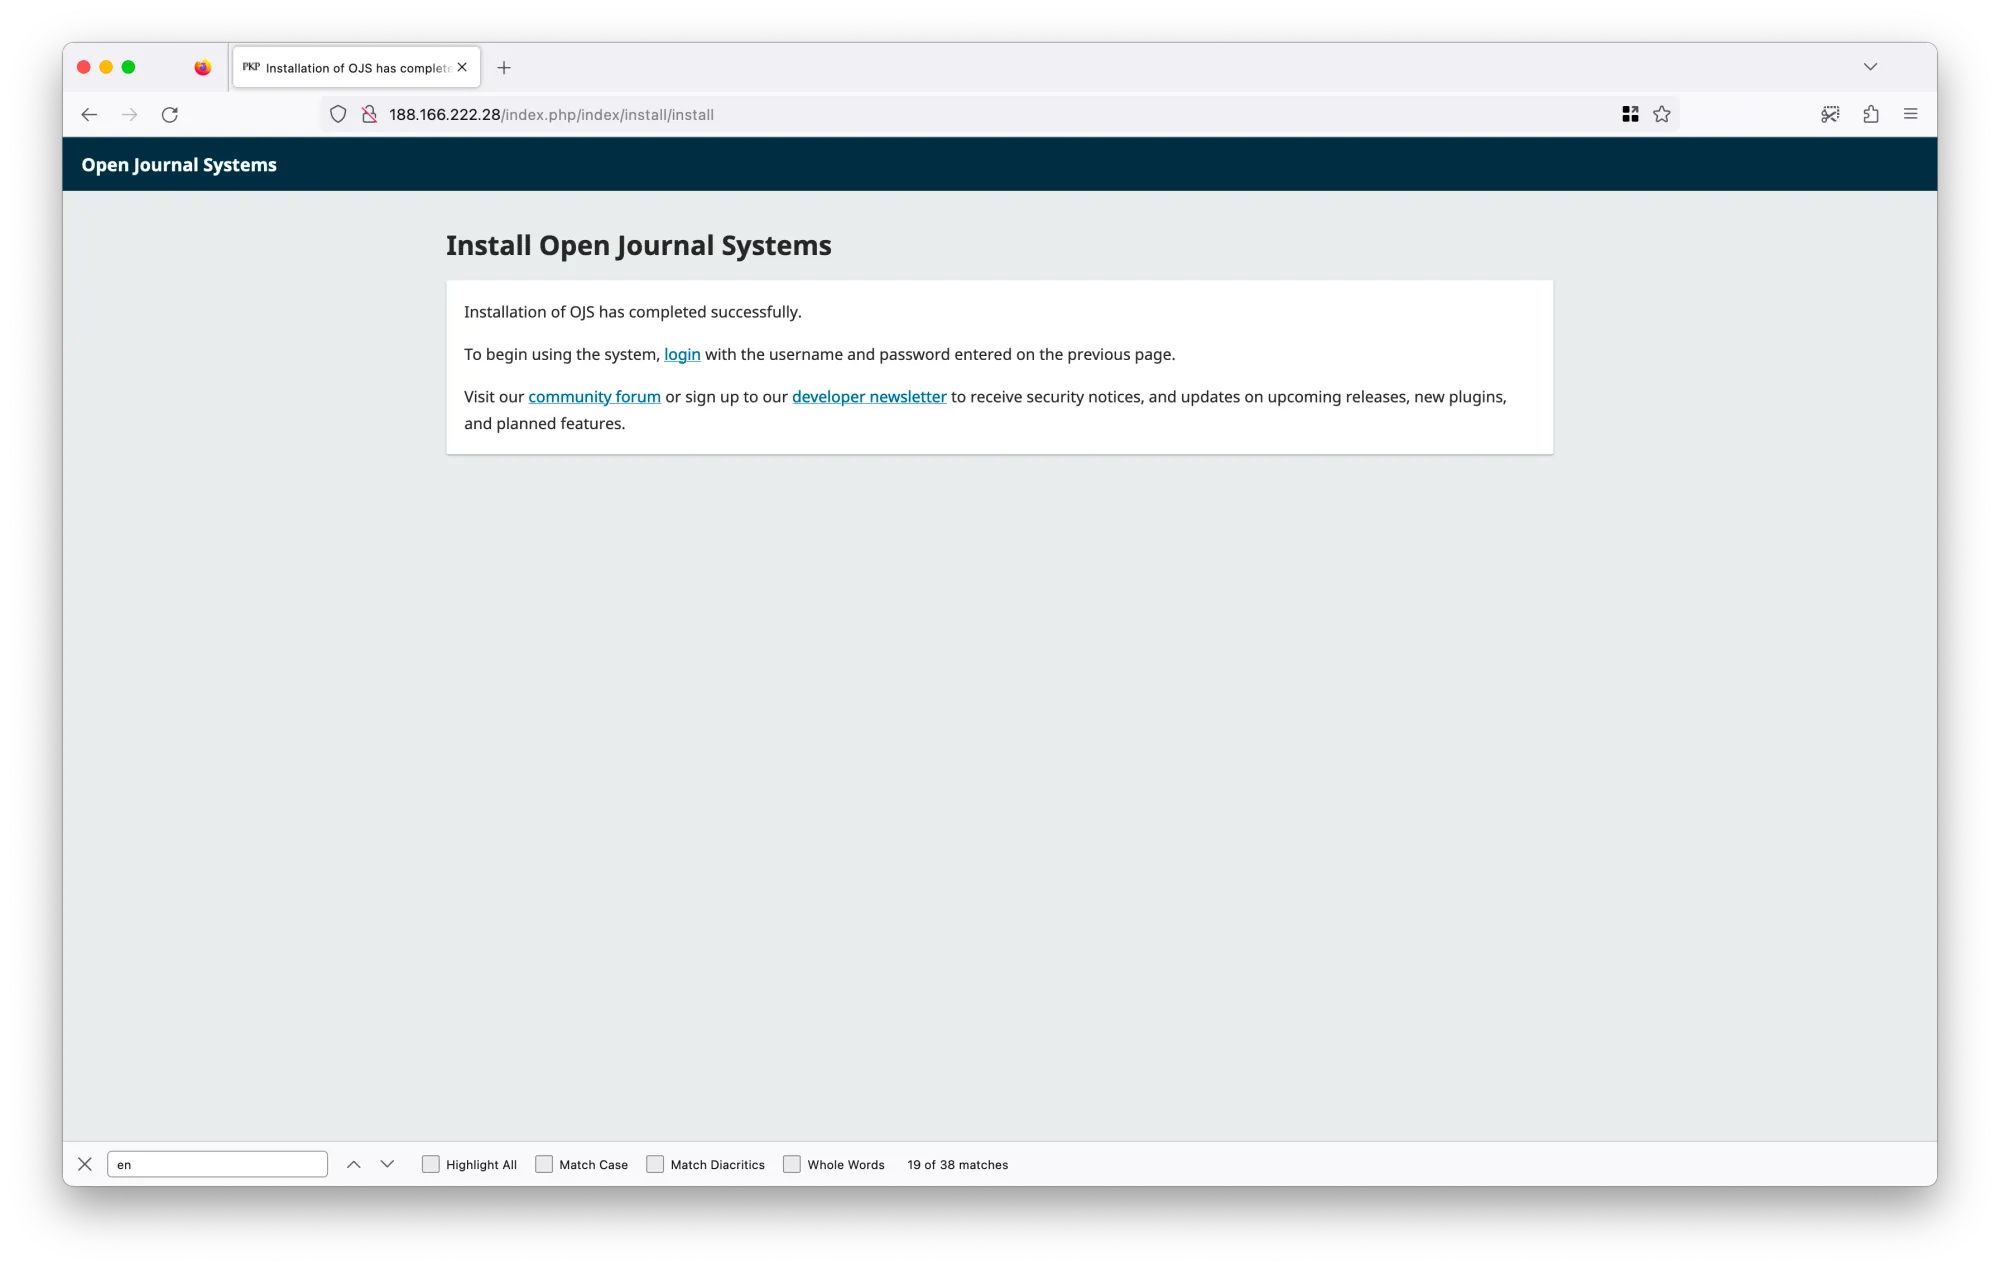
Yep, that is it. Congratulations, you made it to install OJS. In case there is any other question, feel free to contact me.